Gun Control

Wait….WAIT!!!! WAIT!!! Before any NRA member goes off on me, read the words I wrote: Gun C-O-N-T-R-O-L. Not B-A-N. Which is usually what 2nd amendment lovers see when they see “control”.

It’s 1:27 am currently and I cannot sleep. I’ve rotated between sleeping in my 3 year old’s bed and going into my almost 2 year old’s room and taking him out of his crib and rocking him and then back to my bed and back into the boys room. Forty parents are not able to do that tonight. Forty. Twenty babies lives were taken today and it has shaken me to the core. The Clackamas Mall shooting happened just mere miles from my house but this tragic event that took place 3000 miles away has hit me harder.

There are a couple of points I want to hit that are just racing around in my head, so hopefully I can actually go to sleep tonight.

1.) If this is not the time to talk about gun control. I’m not sure when a *good* time is??? Since Columbine, there have been 31 mass shootings and I know some were left off the list. So let’s talk about it. Please.

2.) Banning guns is not the answer. If you outlaw them, then only outlaws will have them. Meth, cocaine, crack and heroine are illegal, right? And how many addicts do we have in the country??? Hell, you’d think it was legal! Make guns illegal, criminals can always find them and then regular ol’ citizens have no self defense. Banning is not the answer.

3.) Control: check, manage, inspect. This is what needs to happen. I looked up on the interwebz today what I would need to go and get a concealed weapons license in the state of Washington. Pretty much all I needed was a clean record, be 21 and have $52. That’s it? Really? To buy a WEAPON. Let’s talk about cars because those can also be seen as a weapon, but obviously are not marketed as one, whereas guns only marketplace is as a weapon, I mean it’d be awesome if I could also shave my legs with it or set it as an alarm clock but guns really have no other purpose. Cars are firstly a mode of transportation BUT with the wrong person behind the wheel it MAY be used as a weapon. Could you imagine if at age 16 you just….got your license? Because that’s about how it would be if I got a gun license with no instruction. Holy hell, I could not imagine! Why is that to get your drivers license you need to be educated, pass a test and then hold liability insurance? But for something that is solely a weapon you can just buy? The equivalent to me getting a gun license is -NO JOKE- giving my 3 year old their drivers license. It’s not even an exaggeration. THAT IS SCARY, PEOPLE!!!!

4.) My solution: psychiatric testing. This would be GREAT for two reasons. One being the obvious- you keep guns out of the hands of people that are most likely to be not mentally stable enough to own a gun. Two being the less obvious of if these people fail tests- they now need to seek treatment. This is the REAL issue here. The mental state of America. Let me tie a little motherhood into this post. If 18 months ago, I was sold a gun with PPD, Lord help us all. But I would have been easily diagnosed, denied a gun and sent to treatment. I just finished (about 2 hours ago) the documentary on death row, do you know that they go under a psychiatric test before they are “cleared” for the death chamber? If they fail, this somehow makes them unfit for death??? I don’t get it. But we don’t psychiatric test people before we give them a weapon that -if used inappropriately- would land them on death row….AND THEN we’d get them that psychiatric test. What?!?! How much sense does that make?! NONE! I also have a history of sleep walking and cleaning out the fridge and waking up in the morning and not remembering a damn thing. That right there makes me NOT FIT to own a gun! Denied and send me to treatment. If America wants anything to get any better, we need to take a good look at this country’s mental state for not only gun control but dozens (maybe even hundreds) of other reasons.

5.) “If we control guns, what about knives, bricks and baseball bats” “Today in China, a man stabbed 20 people with a knife”…..AND THEY ALL LIVED!!!! Did you forget that part of the headline????? Isn’t that the most important part of the headline? Let’s compare apples to apples please. Now let’s pretend you are stupid for a minute while I explain something to you. Picture the events in Connecticut today. Now picture what the scene would have looked like if it had been a knife in his hand. We would have had *maybe* one fatality. Maybe. Someone would have taken him down because the only way to kill someone with any of these other objects is from six inches away. In order to kill someone with a knife, bat or brick, they need to be within arms reach. And how many people do you think one could kill with a baseball back in 7 seconds? One…maybe. Let’s change that to a semi-automatic gun, it boils down to how fast they can pull the trigger and how good their aim is. And forget the option of simply outrunning the attacker, you cannot out run a gun. There are just so many reasons why guns stand about against the rest of these potential weapons (see…potential is also another key word….knives are for cooking…bats are for baseball….bricks are for building….guns are for curling my hair but like the others, they can also be used as a weapon when taken out of context….wait….what?) Does anyone else see how foolish those statements are?

If you made it all the way to the end of my rant, congrats. I’m always open to others opinion because I feel that is how you can learn best, so after reading everyone and their brother’s opinions on facebook today, I decided to form my own after much thought, consideration and reading of others opinions. Surely guns are going to be stolen still and used as murder weapons but I guarantee this country would be a lot safer with guns in the hands of mentally stable people AND getting more American’s the mental help they need because that is ultimately the issue here.

I feel it’s hard for people to put themselves in the shoes of the parents that will be planning their baby’s funeral tomorrow. Try, for two seconds, to put yourself in their shoes. You packed your kids lunch (complete with juice box and PB&J) , put their Curious George book in their backpack and kissed them on top of their head because they still only come up to your shoulder and sent them off to school…..and they never came home. Ever again. I’m serious. Think about it. What happened today (and all the other days there have been mass shootings), what happened is not okay. It’s MORE not okay that American’s second amendment rights being more controlled. Wouldn’t you want that safety for your own child? Why wouldn’t you want it safer for other people’s children too? This becomes a whole ‘nother ball game when innocent children are involved. And unless your suggestion is for LL Bean to start incorporating gun holsters on all model’s of their kid backpacks, we need another solution to keep our kids safe at school. Before I even knew that this shooting had occurred, I was at the museum with my boys and I broke out in a cold sweat and thought, “someone could come in here and shoot this place up” to only get back to our car and find a text from my husband that 26 people had been killed at an elementary school earlier this morning.

Thoughts and prayers to the children, adults and families whose lives were forever altered in this horrendous act. No parent should EVER have to bury their child, ever. My heart will be heavy for a long, long time for these families.


“When I was a boy and I would see scary things in the news, my mother would say to me, ‘Look for the helpers. You will always find people who are helping.’ To this day, especially in times of ‘disaster,’ I remember my mother’s words, and I am always comforted by realizing that there are still so many helpers – so many caring people in this world.”
~ Mister Rogers

Perks of Being a Wallflower by Stephen Chbosky

Perks of Being a Wallflower by Stephen Chbosky


Hmmm….what can I say about this book? Well, we picked it (I actually suggested it…not sure if I still stand behind my suggestion) for our bookclub because we wanted something easy, light and not depressing to read. The book is in a narrative form of letters from the weird main character (Charlie) to someone random that he knows but doesn’t want to give away his identity to this person because they might be able to figure out who he is. So the letter writing technique takes a few minutes to get used to.

To be honest, 99% of the book I was wondering if this whole story was going to have a point to it, or if it’s just going to be letters from a teenaged, high school wallflower. It does have a point to it but you’ll have to wait until the last two letters. It ended up being a depressing book once you read those last two letters though….so now I’ll have to apologize to my bookclub tonight, whoops!

It’s a very quick and easy read, took me about 3 nights to finish it and I’m a terrible reader. It’s only 175 pages so it’s a quick book to read if you are waiting for a book on hold at the library but I’m not sure if I’d recommend it as a “Yes! You HAVE to read this book!”.


Anyway, I’m already halfway through Still Alice by Lisa Genova, which I’m already thinking I would highly recommend.

Lifting with LBEB

Having someone train you via online works pretty well except in the case where you need help right then and there with form or learning a new lift. I’ve had the option all along to videotape at the gym and then send the video over to Katherine but I’ve kind of been too lazy/shy to do that. I’m a person that does better with in person critiquing.

So it dawned on me that the Lift Big Eat Big team are only a short drive (2.5 hours- which is really short compared to how far all of their fans all over the country would need to travel) so I went out on a limb and ask Katherine if this would be a good idea. Obviously, she said, “OF COURSE!” so I went out on a limb and emailed them (well Brandon; the leader, coach, CEO, owner…not sure what his specific title is) if it would be okay if I scheduled a time to get some help from them with specifically squat and deadlift form and then learn olympic lifts. He emailed right back and said that they welcome drop-ins to get coached along side his team. Good enough for me! Any help is better than no help.

So last Thursday our family drop up to Seattle and dropped me off at their doorstep. I was beyond nervous because I know I’m not even 10% as strong as these guys (and girls!), so it felt a little embarrassing, but I had to swallow my pride and remind myself that everyone starts somewhere and I might as well have a correct start. As soon as I walked in the door, right off Brandon just says, “Hey! You Kat?” thanks for breaking the ice for me.

We wasted no time (just my style) and got right into warming up and stretching. I had been doing a lot of dynamic stretching before lifting but I was also doing static stretching, which I learned I should be doing that after and not before. After about 10 minutes of warming up and stretching, we headed to the squat rack. Around us, there are about 6-8 people throwing some heavy weights around but every single person came up to me and introduced themselves and was beyond nice. My fear and embarrassment literally washed away. I’m pretty sure they were nicer than any quilting group I could have dropped into.

So we started with squats. Probably the #1 thing I wanted to work on. Up until then, I had been squatting to parallel…or what I was thinking was parallel because it’s really hard and awkward to look in the mirror to see how far down you are while you are holding your breath and trying to concentrate on what in the world you are doing. Brandon had me put the bar on my shoulders and step back out of the rack, put my heels up on two plates and point my toes slightly out. I sat back and did my typical parallel squat. He then had me rack the bar and then explained that this time, he wants to forget anything I was ever taught and let me knees go over my toes and just sit straight down, chest up, elbows down. I was up for the challenge but not without asking him to stand behind me in case I fell backwards. I got the bar on my shoulders and sat straight down and stood straight back up. I have no complete my first ATG squat. Ass. To. Grass. I racked the bar and waiting for my critique. Before he said anything, that squat felt WAY more natural than what I was doing before. Harder? Yes. But WAY less awkward. He looked at me and said, “I’m not quite sure if there really is a such thing as a squat too deep, but you possibly could fit this definition”. I took this as a compliment. He added that if I had that kind of flexibility in my hips that I should squat that way so I can keep the flexibility I have.  However, if I ever wanted to squat for weight (powerlift) then I wouldn’t want to get that deep.

So we add some plates to the bar and I get going on my 5 x 5 squats. During one of my sets, I heard from somewhere in the distant left, “Look at how far down she goes” and I think that is where my self confidence went from about a 3 to a 9 in that day. It continued later on when someone else needed to learn to go deeper and Brandon yelled over to me, “Hey Kat, air squat” took me about 4 seconds to figure out what in the world he was talking about and then busted out an air squat. Squatting deep: check.

Then we moved onto presses. I assumed chest presses but I was wrong, overhead presses. Not sure which one is worse because they are both pretty pitiful. Basically just practiced on moving my head under the bar as soon as the bar went over my head so I wasn’t using my chest the entire time to press and to allow my shoulders to help more.

After that we moved onto the deadlift. This is where I still have serious problems. There is something about my glutes or hamstrings that will not allow me to hold onto the bar with my hands and sit back (as opposed to having my butt high in the air and bent at the waist) and then stand up. Before I came in, I was 100% aware I was using mostly my lower back to pick up the weight. My goal today was to fix this. I’m not sure if it’s a strength thing or a flexibility thing but when I get my butt down, I start shaking and can barely hold myself in the start position, let alone stand up. We worked and worked and worked on this (while adding weight) and every time I felt 100% awkward. We worked up to my 2RM (~55kg) and I still felt super awkwardsauce about the whole thing. I need to practice is what it is.

So then we ran out of time to hit on any olympic lifts. I left the facility hoping I could come back in two weeks when we were up in Bellevue for a week but I needed to find a friend to watch the boys for me. Guess what? One of my friends is taking the boys on the 29th so I get to go back and work some more. On top of that, my husband and my sister are getting me some olympic weightlifting shoes for my birthday so I can scrap the plates under heels and not need to go barefoot during deadlifts.

I’m extremely grateful (this is the month of thanks, right?) for Katherine of getting me into all of this and having the connection with LBEB that ultimately let me to getting to train with some of the best of the best. I’m also thankful for my husband driving my butt all the way up there to do something that he thinks is kind of an odd thing for me to ever get into, “So how many mom’s were there???” haha. And I’m obviously thankful for LBEB for taking the time to work with me! If anyone ever gets the opportunity to get in on some training with them, you won’t regret it!

Whole Wheat Herbed Pizza Crust

This is from my King Arthur Flour Whole Grain Baking book (that I stole from my mom 3 years ago and I’ve made about 50% of the 5 inch thick book). I had some left over whey from making yogurt and so I added it to the crust dough instead of water and honestly I really couldn’t tell it was even in there. I don’t know if I was suppose to noticed something or it is rendered tasteless when baked in bread? Anyway! Oh by the way, this is two pizza crusts worth. I’ll add in where you can wrap up the other crust and freeze for another time.

Ingredients:

  • 3 3/4 (15 ounces) whole wheat bread flour (or whole wheat)
  • 1 Tbsp plus 1 1/2 tsp instant yeast
  • 1 1/2 cups (12 ounces) cool water (this is where I used the whey, but I only had 1 cup so I added 1/2 water for the liquid)
  • 1 Tbsp honey
  • 1 Tbsp olive oil
  • 2 tsp salt
  • 1 Tbsp dried oregano
  • 1 Tbsp dried basil
  • 1/2 tsp cayenne pepper

Measure two cups of the flour into a medium bowl and stir in the yeast. Combine the water/whey with the honey. Since this is cold, it’s kind of frustrating to get the two to combine.

Add this to the flour. Stir well to combine and let sit for 1 hour.

After 1 hour, you should see obvious air bubbles from the yeast working. If you don’t, then your yeast is crap and it’s time to buy some new stuff 🙂 It’s kind of hard to see in the photo below, but the dough (starter is what it’s called right now) should be puffy somewhat as well.

Add the remaining 1 3/4 cups of flour. Either knead by hand (chyeah right!) or let it knead in your kitchen aid with the dough hook (now we’re talking!) or you can let it mix in your bread machine.

Allow to rise in a warm place (oven OFF with the light ON is always a good place in the winter) for about 1.5 hours until doubled.

I didn’t touch the dough between the last two photos, so you can see that it has really puffed up but is still a really wet dough. It’s okay. Don’t worry. Turn the dough out onto a lightly floured surface. Cut in half with a knife or a bench knife. Note: This is when you would take the other crust dough that you might not be using and wrap it in plastic wrap and put it in the freezer.

Roll out into a 12-inch circle.

Place on a baking stone or a pizza pan lined with parchment paper. If you are nervous about moving the dough, fold it in quarters and then move it onto the pan/stone and then unfold it, much like a pie crust. If you have no clue what I’m talking about, look below.

Bam.

Bam.

Bam!

Bake on 375F for 10 minutes. Remove from oven. Turn oven temperature up to 425F.

Now is where you can just go crazy. We added tomato sauce, bell pepper and olives but you can do pesto or bbq sauce and whatever your heart desires.

I used 8 ounces of part skim mozzarella cheese on the pizza, so 1 ounce per slice. Then topped with dried oregano and fresh ground black pepper.

Bake for 10-12 minutes. So I was outside gabbing with my neighbor when I put this in the oven so my husband had taken it out and cut it up already by the time I came in 🙂

So here is the nutritional info. The crust ingredients are for 2 pizzas, the serving size here is for 1/4 of one pizza, so two slices (if you cut into 8 pieces like we did above). This is for the crust only so you can use this whatever toppings and sauce you want.

Serving: 1/4 pizza (2 slices)

Calories: 220.6

Fat: 2.7 g

Carbs: 45 g

Protein: 7.7 g

Now if you used tomato sauce with 8 oz cheese and veggies this is your nutritional info:

Serving: 1/4 pizza (2 slices)

Calories: 401

Fat: 13 g

Carbs: 50 g

Protein: 19 g

Pumpkin Spice Granola

Well I needed something to go with all that yogurt I just made, right?? And ’tis the season for making everything pumpkin, right? Well, I got my googling fingers going and came across Healthy Food for Living blog and the recipe I have linked. Granola is something is so cheap to make at home but wicked expensive to buy in the store (pulled out my Mainer there budday).

I followed the recipe word for word, so you can jump over to her blog to see the recipe. I used chopped walnuts and sunflower seeds (raw) for the nuts and raisins for the fruit.

I do, however, I have the nutritional info for you! Granola calories can sometimes make your heart stop when you see how dense they are but this one isn’t too bad!

Serving Size 1/2 cup, makes 12 servings:

Calories: 152

Fat: 6.3 g

Carbs: 24.7 g

Protein: 3.3 g

Homemade Graham Crackers

My mom sent me a blog post from Food Renegade about doing a homemade cracker challenge and the giveaway was a top of the line grain grinder, which for the past couple of months has been a *want* for me but they are over $500 for a good one. So I decided to try making some graham crackers and for an entry.

They used a flour I honestly had never heard of (einkorn) so I decided to use spelt flour instead.

  • 2 cups spelt flour (8 ounces)
  • 1/2 tsp sea salt
  • 1/2 tsp baking powder
  • 1/4 tsp baking soda
  • 5 Tbsp coconut oil (defumed if you have it)
  • 1/4 cup milk (I used unsweetened almond milk)
  • 5 Tbsp honey
  • 1/2 tsp coarse sugar for sprinkling
  • 1/2 tsp cinnamon for sprinkling

Heat oven to 350F

Mix flour, salt, baking powder and baking soda together in your stand mixer with the paddle. Add oil, honey and milk until well combined.

Should be a really wet dough but hold together if you made a ball. Scrape it out of the bowl and onto a sheet of parchment paper on a smooth, hard surface.

Put another piece of parchment paper on top and roll until 1/8 inch thick.

I was a little shy about rolling it too thin, so this turned out to be too thick but the crackers were still YUMMMM!


Take the top piece of parchment paper off and sprinkle with sugar and cinnamon. Score with a pizza cutter into 1 inch by 1 inch squares.
I then slid the parchment paper onto a round pizza cooking sheet that has holes in the bottom. My hopes were that it’s help crisp up the crackers more.

Bake for 18 minutes. Turning halfway if you don’t have an even cooking oven like myself.

Slide the crackers off the pan and onto a cooling rack. Let cool completely and then break along the lines.

Store in an airtight container and enjoy!


Nutritional Info per 1 square (11 g):

  • Calories: 53.6
  • Fat: 2.2 g
  • Carbs: 7.5g
  • Protein: 0.9g

Homemade Yogurt Continued…

So I had some people ask me if what I made the day before was thick and creamy like Greek yogurt and my answer was no. In order to have thick Greek yogurt, you need to strain it. To do this you just take a mesh strainer and lay either cheese cloth, coffee filters or a paper towel in it and then dump your yogurt on top and let it sit overnight in the fridge.

I happened to have an actual yogurt strainer in my cupboard of appliances….along with an actual yogurt maker.

Just place the strainer in the container and then dump the yogurt in the strainer.

Cover and put in the fridge overnight.

This is what I had in the morning. Greek yogurt on the left and whey on the right. As you might be able to see, there is a little bit of yogurt in the whey, so maybe a coffee filter would be a little better with the strainer than just the strainer alone. I have no idea. I’ve never done this before.

There is the yogurt. I ran my finger through it to see how thick it is.

Here is a comparison between the strained yogurt (on top) and then regular yogurt straight out of the crock pot (on bottom)

Yumm!! Apparently, if you keep letting the yogurt strain you will get cream cheese. Will have to test this some time….

So here is the whey. So I looked online to see what to do with this other than put it in smoothies. One of the things I found was to use it in making bread instead of whatever liquid is in the recipe. So now I have whole wheat herbed pizza dough rising downstairs. As always, a recipe will follow 🙂


Added:

If you are looking for the nutritional information of the liquid whey, well you have come to the right place since I looked to the end of the interwebz to find this info:

Serving size: 1 cup

Calories: 59

Fat: 0.2 g

Carbs: 12.6 g

Protein: 1.9 g

This is what is dripping out of your yogurt (or settling on top if you aren’t straining it on purpose).


Now you can use this to calculate nutritional info for stuff when you sub in liquid whey for other things.

Homemade Yogurt

I was always against plain yogurt. Gross. I tried everything to sweeten it from honey to sugar free Torani syrups to stevia drops. I never liked it. Then I started adding a teaspoon of homemade jam to it and then I actually started liking it. Now I’m at the point where I can just eat it plain and eat a lot of it. At Costco I think I pay about $5.99 for a quart of Fage Greek yogurt and I easily eat it within the week. My mom has always bugged me about making my own but it’s always scared me. I’ve randomly googled how to make it in a crockpot since I “overheard” on facebook that you could make it that way but I was still to scared. Once I realized that even if it was a flop, I only wasted about $2, I decided to take the plunge and I’m glad I did! I’ve made it twice now, the first time was a total failure but I figured out what my mistake was and the second time was a total success. I’ll share both things with you so hopefully you can get it right the first time!

So on clearance I found a half gallon of organic milk for $2.99 and 1 cup of organic plain yogurt for $0.49. This will make a half gallon of organic yogurt for $3.48 compared to $3.99 for a quart of organic (so x2 would be $7.98 for a half gallon for a savings of $4.50).

First, get out your crock pot and turn it on low and put the lid on so the stone can warm up. It takes about 30 minutes but it will also take about 30 minutes for the milk to be ready to put in it.

Next, pour however much milk you want to make into yogurt into a saucepan and warm it on medium (stirring frequently so it doesn’t burn) until the temperature reaches 185 degrees F. I just used a digital meat thermometer but word on the street is that you can get candy thermometers for less than $10.

While the milk is warming on the stove, take 1/4 cup of already made yogurt per every quart of milk you are making into yogurt and put it in a medium bowl. It’s best to let this warm up a bit so it doesn’t cool the milk down in the second to last step. So I’m making a half gallon so I used 1/2 cup of yogurt for the 1/2 gallon (2 quarts) of milk. Tip: After this batch is done and you are putting it into containers, save however much yogurt you need for the next batch from the batch you just made.

Once the milk in the pan reaches 185 degrees F, turn the stove off, remove pot from burner, cover and place the pot in a few inches of cool water (I just fill my sink up a little). This is where I screwed up the first time. Let the milk cool from 185 degrees down to 115 degrees. First time I let it cool down to 90 because I wasn’t paying attention and the blog I was following said between 90-110 and it would take about 10 minutes. Well after about 5 minutes it cooled way down. The second time I only let it cool to 115 and my yogurt came out perfectly.
After yogurt has cooled to 115, take 1 cup of the warm milk and whisk it with the yogurt in the medium bowl. Take the rest of the milk and pour it into your crockpot. Immediately turn off and unplug your crock pot and remove the stone. Then add the milk and yogurt mixture to the rest of the milk in the crockpot. Whisk together briefly.

Now there are two options of what to do with your crockpot for the next 8-12 hours. I do this at night so it’s ready in the morning. Some just wrap the crockpot in a heavy towel or blanket to keep warm (did this the first time and it wasn’t very warm in the morning) or you can put your crockpot in a TURNED OFF oven with the oven light on. I chose to do that the second time.

Shut the door and leave the light on all night. It needs to be about 70 degrees in your house for this to really stay warm, if it’s colder than that (like our house now), leave it in the oven.

So the next morning this is what I woke up to:

And I ran a spoon through it so you could see how thick it is:

I then put the whole crockpot in the fridge to cool and to thicken more (which is thickened up a little bit more after cooling).

Then I stored in mason jars, since we all know I have about 10 million of these 🙂

I’ll eat the two quarts within the week with pumpkin spice granola (recipe to come) and then the little pint is enough to start my next batch! Perfect! Saved $4.50 a week so that’s $18 a month and on top of that I now have organic yogurt!

Note added: If you want it real thick, like Greek yogurt, you need to strain it as it sits in the fridge. So take some cheesecloth, coffee filters or a paper towel and line a mesh strainer and dump the yogurt into the strainer and put something like a large bowl under it so the liquid (the whey) can drip down. You can either discard the whey or you can drink it or add it to smoothies since it’s good for your digestive system.


Continue HERE if you want to see how to make Greek yogurt now

Weeks 1 & 2

First week of my plan from my trainer was absolute hell. The only way for me to describe it is when I’m running and I’m nearing the end of my mileage for that run and I have to say to myself, “Just two more miles, just two more miles. You can do it!” or “Just one foot in front of the other. Just one foot in front of the other”. I’ve never had to do this when it comes to lifting. At least not in this extreme where I really want to quit but I know I *should* finish. It’s easy to do that when the only person you are reporting to is yourself. I had to say to myself A LOT, “I can’t do this….seriously…my <insert any muscle group here> are going to fall off”. Don’t underestimate what only 4-5 exercises can do to ones body in a strength training workout. My first leg day I didn’t think I was going to be able to drive home. I certainly could not walk correctly for the days after. And this goes for all of my workouts that week. I. Hurt. Bad. I never ran that week. Even when my legs felt fine (which never really happened), my arms hurt too much to swing them.

As far as nutrition went, I ate a lot of food. My body needed it to recover. I ate a lot of carbs and a lot of fat and quite a bit of protein. I’m waiting for MGN to restock on muscleandstrength.com but they seem to not be well informed with dates of shipment because almost 2 months ago I asked and they said, “two weeks to ten days” and then I asked three weeks later and it was “within the week” and now it’s been 2.5 more weeks and still out of stock. Anyway, I lost 4 pounds and my size 6 pants from college fit again. They have fit me three times since college. Pregnant with #!, pregnant with #2, at the end of marathon training and this week. I log my food on sparkpeople.com. They have a huge database and it’s easy to enter something if it’s not on there. Also, you can do a recipe count too. Just put in the ingredients and put number of servings and it tells you the macros. I had an issue the first 4-5 days about not eating enough the first half of the day and then logging my stuff after dinner and going, “Ummm…I have 500 extra calories….” so I’ve been eating bigger breakfasts and lunches now. I really have to set a timer at 3 hours because my household is so out of control that I really lose track of time. If I’m hungry at 2 hours or 2.5 hours, I just eat then but 90% of the time I forget about it. This has really curbed me from binge eating right before dinner every night or eating waaaaaaay too much during dinner.


During week 2, my muscles were kind of expecting the same beating again so they were more prepared. I was still sore. Still had to talk myself through a few sets but nothing like week 1. If it was easy, then I moved my weights up. I also got food poisoning during the week and then at the end of the week, I was grocery shopping with the family (for the first time in a year I think) and I about passed out in the produce section and threw up in the bathroom. I have no idea what that was all about. So I went two days of pretty much not being able to eat and then two days of pretty much eating whatever I saw because I was so hungry. My weight hasn’t changed at all, makes sense. I wouldn’t have even been surprised if I had gained weight. Either way, I’m not too worried about my weight, just my gains in strength and loss of inches, which I promised my trainer I would not measure myself for 10 weeks.


I’m glad to see where my starting point is (not strong AT ALL) so I can start to improve from there. This is pretty much rock bottom for me. Pretty sure 80 year old women are stronger than me 🙂

How To Make Applesauce…

…by the truckload. Last year I canned 300 pounds of applesauce. No I didn’t mean 30, I meant three hundred. Wanna know how much we have left? After today, 3 quarts. What in the world do we do with it all? Well, the boys eat it, literally, by the quart. Once I open one, it’s gone within 30 minutes. I also sub oil and butter out all the time for applesauce in baking and pancakes.

So we had all those apples from apple picking on Saturday but after we ate a lot and I made an apple pie, it only made 6 quarts, which, if we are lucky, would last us to Thanksgiving. Don’t worry, I have 35 pounds coming to me on Saturday 🙂

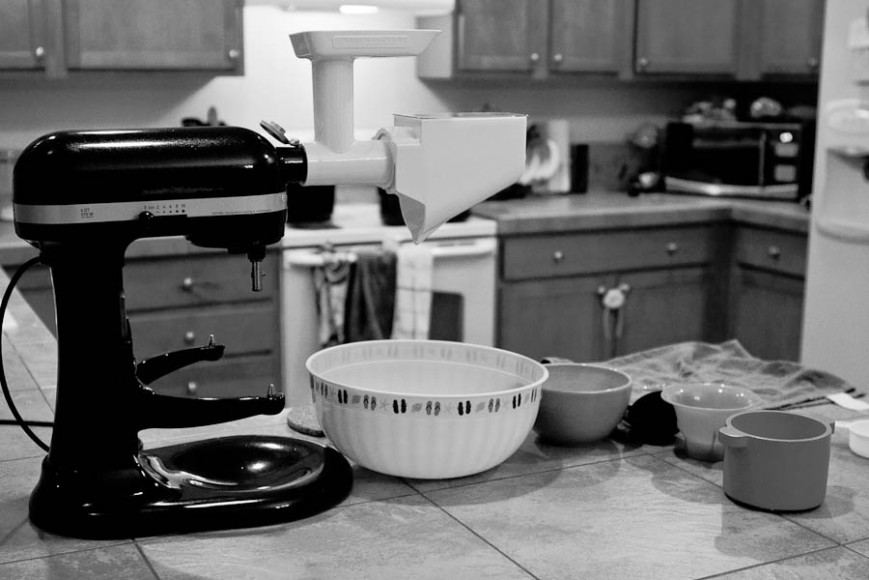
Okay, so this is the setup.

Starting from the left we have my Kitchenaid Pro 600 with the meat grinder attachment and the fruit and veggie strainer attachment. You need to buy both of them in order to strain. Under the strainer is my sauce bowl and the little bowl next to that one is what I like to call the “apple poop” bowl.

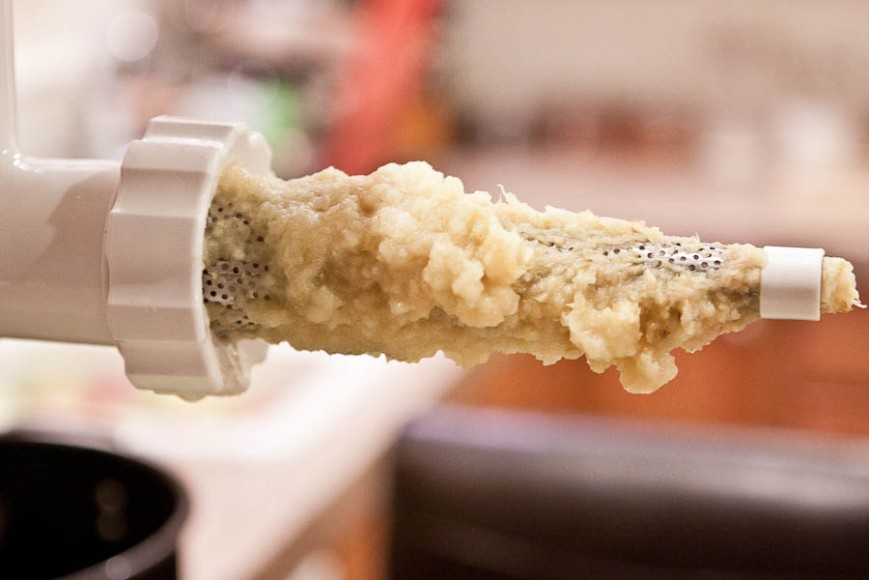
This is what the strainer looks like

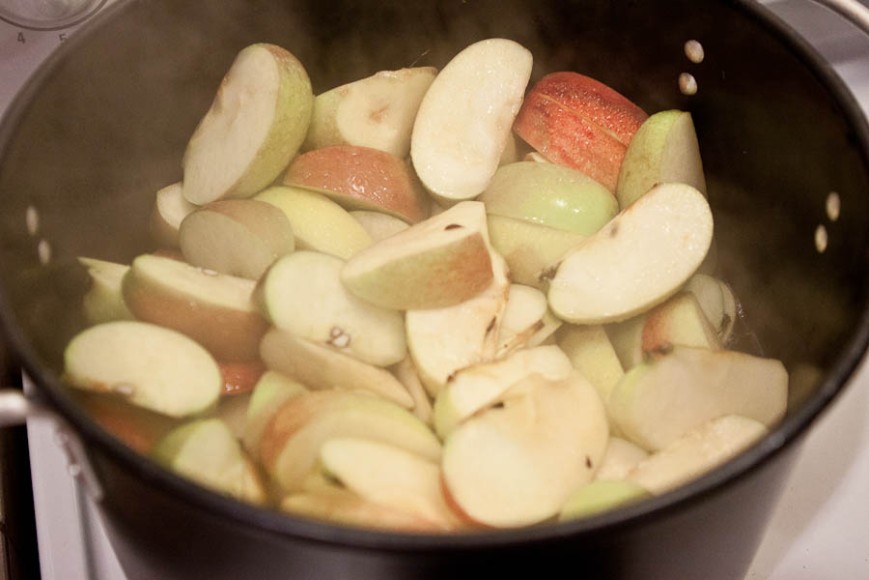
So eighth the apples. Don’t core them. Don’t seed them. Don’t peel them. If I had to do all that crap stuff, I would never make applesauce. Toss them into a huge pot and put enough water in the bottom to prevent sticking, like an inch. Cover and set the burner to medium to medium high. Let the apple steam until they are starting to turn a warm yellow/brown color and they are very tender. It never fails that I am to anxious and start straining the first batch of the season with rock hard apples, which is a total pain the butt and very frustrating.

Done and nice and mushy

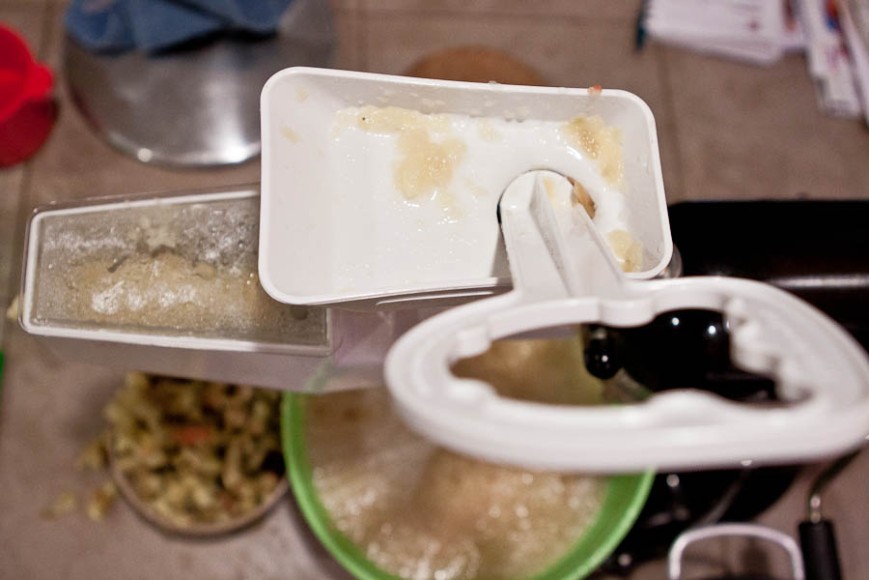
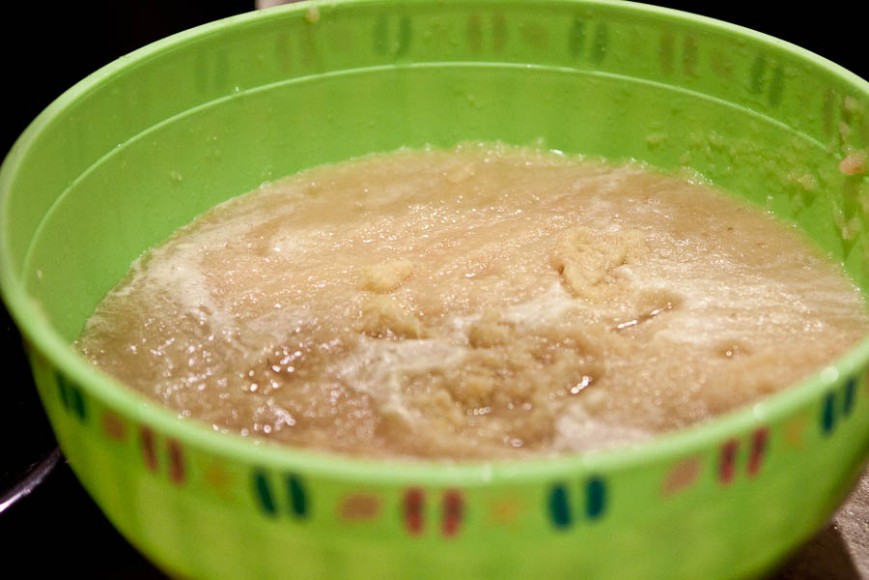
Start ladling them into the hopper with a slotted spoon and plunge them down into the strainer. They should go down EASILY. If they don’t, you are about to learn your lesson 🙂 If you look down below, you’ll see the green bowl of piping hot sauce and on the left the bowl of apple poop, which is just the peel and seeds.

Nice and freshly strained applesauce

Nice big bowl of it ready to be canned. You will not need to heat it up on the stove before filling your hot and clean jars with it. It is extremely hot. I dropped some on my foot and I have a burn mark, so don’t worry, it’s really hot straight from the strainer.

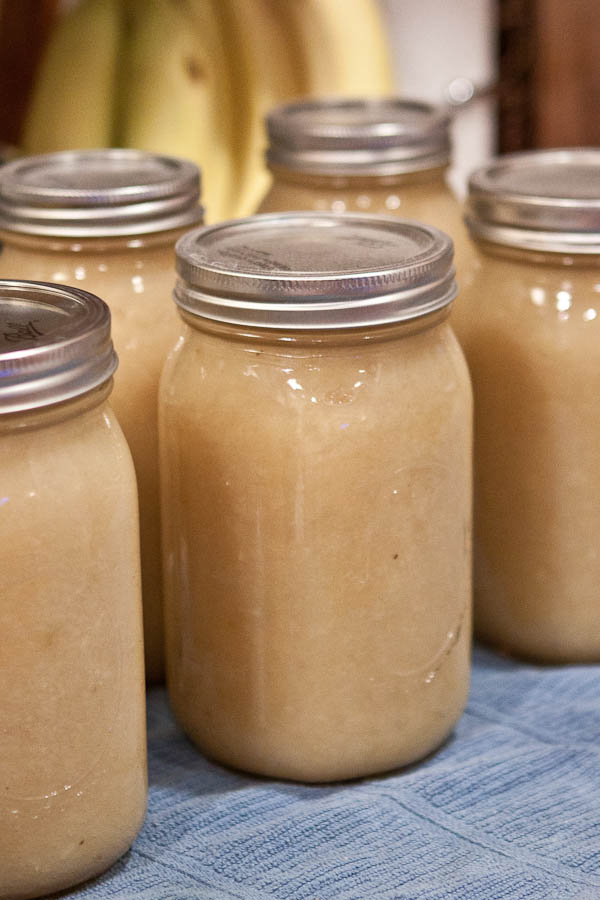
Ladle it onto hot and clean jars, place lids, screw bands on and process pints and quarts for 20 minutes.